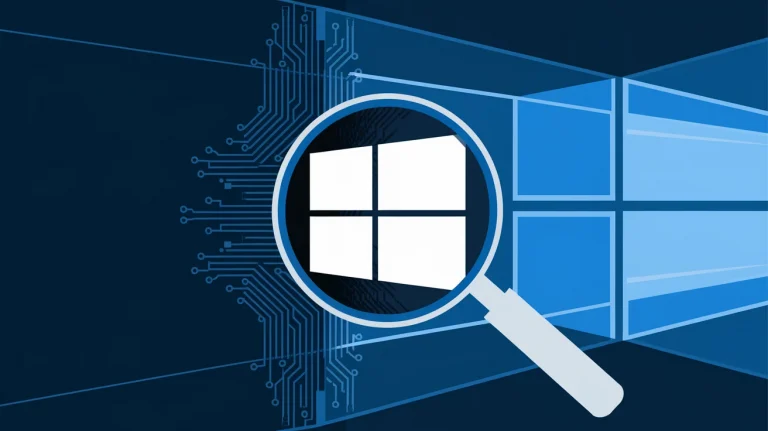
The Clock Is Already Running
Your SIEM flags a suspicious PowerShell execution on a domain controller at 11:43 PM. The endpoint detection tool confirms process injection consistent with MITRE ATT&CK Execution (TA0002). You have two choices: spend four hours imaging a 2 TB disk, or run forensic triage on Windows and have actionable artifacts in your analysis tool within 15 minutes. For any IR team that measures success in mean time to detect and mean time to respond, the answer is obvious.
During an incident response engagement last quarter, one of our managed customers had exactly this scenario play out across six endpoints simultaneously. Full disk imaging was not an option. We triaged all six machines in under 90 minutes and had a timeline of lateral movement built before the threat actor finished staging data for exfiltration. That engagement reinforced what I have believed for years: triage-first is the only approach that scales under pressure.
Why Triage Beats Full Imaging in Most Engagements
Over the past decade, the IR discipline has shifted away from acquiring full forensic images during active incidents. The math is straightforward. A 1 TB disk image takes hours to acquire and transfer. RAM dumps on servers with 64 GB or more add even more time. Meanwhile, a triage collection pulls the artifacts that matter in 5 to 15 minutes and can be shared for analysis immediately.
Full imaging still has its place. When endpoint visibility is poor, when security controls were never deployed, or when legal proceedings demand a bit-for-bit copy, you image the disk. But in the vast majority of incidents, forensic triage is sufficient to reconstruct threat actor behavior and identify indicators of compromise. Trying to image every endpoint in a 200-machine environment during an active breach is not thoroughness. It is operational paralysis.
I will take a firm position here: if your IR playbook defaults to full disk imaging as step one, you are losing time you cannot recover. Triage first. Image selectively when triage reveals gaps.
The Core Artifact Checklist
Forensic triage on Windows targets a specific set of non-volatile artifacts. These are files and data stores that persist on disk and survive reboots. The exact paths shift between Windows versions, but the categories remain consistent.
Minimum Triage Artifacts
At minimum, every triage collection should include these four artifact groups:
- File system metafiles — The MFT ($MFT), USN Journal ($UsnJrnl:$J), and $LogFile. These tell you what files existed, when they were created or modified, and what changes occurred on the volume. The MFT alone can reconstruct file activity even after deletion.
- Windows Event Logs — Security, System, PowerShell Operational, Sysmon (if deployed), and Task Scheduler logs at minimum. Event ID 4688 (process creation), 4624/4625 (logon events), and 7045 (service installation) are your first-pass detection surface. Collect everything under
C:\Windows\System32\winevt\Logs\. - Registry hives — SAM, SYSTEM, SOFTWARE, SECURITY, and each user’s NTUSER.DAT. The registry contains persistence mechanisms (Run keys, services, scheduled tasks), USB history, network profiles, and application execution metadata. Map these to MITRE ATT&CK Persistence (TA0003) techniques during analysis.
- Execution artifacts — Prefetch files (
C:\Windows\Prefetch\), Amcache.hve, ShimCache entries within the SYSTEM hive, and SRUM (C:\Windows\System32\sru\SRUDB.dat). These prove what ran, when it ran, and in some cases how many times.
Depending on the incident type, extend the collection. Ransomware engagements call for browser history and download artifacts. Business email compromise may need Outlook OST/PST files. Lateral movement investigations benefit from remote desktop bitmap cache and WMI repository files. Adapt the checklist to the threat, but never skip the core four.
Tooling: What Actually Works at Scale
There are three categories of collection tools, and each has a role in the triage workflow.
Built-in OS Tools
PowerShell, CMD, and WMI let you query live system state and pull individual files remotely. For ad hoc checks during initial scoping, these are invaluable. A quick example — pulling process creation events via PowerShell remoting across multiple endpoints:
# Collect Security Event ID 4688 (Process Creation) from remote endpoints
$targets = Get-Content .\endpoints.txt
Invoke-Command -ComputerName $targets -ThrottleLimit 10 -ScriptBlock {
    # Pull last 24 hours of process creation events
    $cutoff = (Get-Date).AddHours(-24)
    Get-WinEvent -FilterHashtable @{
        LogName   = 'Security'
        Id        = 4688
        StartTime = $cutoff
    } -MaxEvents 500 | Select-Object TimeCreated,
        @{N='NewProcess';E={$_.Properties[5].Value}},
        @{N='ParentProcess';E={$_.Properties[13].Value}},
        @{N='CommandLine';E={$_.Properties[8].Value}}
} | Export-Csv .\ProcessCreation_Triage.csv -NoTypeInformation
The -ThrottleLimit 10 parameter controls concurrent connections, which matters when you are scaling PowerShell operations across dozens of endpoints. Built-in tools are agentless and leave a minimal footprint, but they require remote management protocols like PSRemoting or WinRM to be enabled.
Dedicated Triage Tools
For structured, repeatable collections, purpose-built tools are the standard. KAPE (Kroll Artifact Parser and Extractor) is the one I reach for first. It uses target definitions to specify which artifacts to collect and module definitions to parse them on the fly. A single KAPE command can collect the entire core artifact set:
:: KAPE triage — collect core forensic artifacts to a network share
kape.exe --tsource C: --tdest \\forensicshare\case042\%m --target !SANS_Triage --vhdx %m_triage
The !SANS_Triage compound target pulls file system metadata, event logs, registry hives, prefetch, amcache, SRUM, and more. Output goes into a VHDX container named after the machine, ready for analysis in your tool of choice. Other solid options include CyLR for lightweight collection, Velociraptor for agent-based hunts at enterprise scale, and Eric Zimmerman’s tools for artifact parsing.
One caveat: no single triage target list is universal. We built custom KAPE targets for a financial services client whose environment ran a non-standard logging configuration. The default targets missed their application-specific audit logs entirely. Always validate your collection scope against the actual environment before you trust it in an incident.
Imaging Tools for Selective Use
FTK Imager and EnCase remain necessary for situations where triage is not enough. When you need to recover deleted files from unallocated space, examine an encrypted volume, or preserve evidence for legal proceedings with strict chain-of-custody requirements, full or logical imaging is the right call. The key is making that decision deliberately, not defaulting to it.
The 15-Minute Triage Playbook
Here is the playbook we run. Adapt it to your environment, but the sequencing matters.
Minutes 0–2: Scope and Isolate
Confirm which endpoints are affected using your EDR or SIEM alerts. If network containment is warranted, isolate the endpoint at the network level but keep it powered on. Powering off destroys volatile data and can trigger destructive malware.
Minutes 2–5: Deploy Collection
Push your triage tool to the endpoint. If you have PSRemoting or an EDR with live response capability, use it. If not, a USB drive with KAPE works for on-site responders. Start the collection targeting the core artifact set. Do not wait for the collection to finish before moving to the next machine.
Minutes 5–12: Parallel Collection and Initial Review
While triage runs, pull volatile data if the endpoint is still live. Active network connections (netstat -anob), running processes (tasklist /v), and scheduled tasks (schtasks /query /fo CSV) all provide immediate context. If you have automated packet capture sessions running on the segment, preserve those as well.
Minutes 12–15: Verify and Transfer
Confirm the triage package is complete. Hash the output container with SHA-256 for integrity. Transfer to your analysis workstation or forensic share. Log the collection in your case management system with endpoint name, collection time, analyst name, and hash value.
This playbook has handled everything from single-endpoint compromises to a 40-machine lateral movement case we worked for a regional healthcare provider. It scales because it is parallel by design — you do not wait for one endpoint to finish before starting the next.
Tuning Your Triage Scope Without Losing Coverage
Alert fatigue is a real problem in detection engineering, and artifact fatigue is its cousin in forensics. Collecting too much slows your analysis. Collecting too little means you miss the pivot point in the attack chain.
My guidance: start with the core four artifact groups for every engagement. After your initial pass, let the evidence guide expansion. If you see Lateral Movement (TA0008) indicators, add WMI repository files and remote service event logs. If you see Exfiltration (TA0010) signs, add browser artifacts and cloud sync logs. This iterative approach keeps your first-pass fast and your follow-up targeted.
Review your artifact target lists quarterly. Windows updates shift file locations. New applications introduce new evidence sources. Group Policy changes can redirect event logs to non-default paths. We inherited an environment for a logistics client where Group Policy modifications had moved critical audit logs to a secondary volume — our default triage targets collected nothing from that path until we discovered the gap during a tabletop exercise. That discovery during a drill was fortunate. During a real incident, it would have been costly.
What Triage Cannot Do
Triage has limits, and pretending otherwise is irresponsible. You will not recover deleted files from unallocated disk space with a triage collection. You will not capture the full contents of encrypted containers unless the volume is mounted at collection time. Memory-resident malware that never touches disk will not appear in file system artifacts — you need a memory dump for that, which adds time and complexity.
For incidents that may lead to litigation, discuss with legal counsel whether triage artifacts meet evidentiary standards in your jurisdiction. Some courts expect full disk images with documented chain of custody. A triage collection, no matter how well-executed, may not satisfy those requirements. Know your legal obligations before the incident, not during it.
The Practical Takeaway
Build your triage capability now, before the next incident. Validate your artifact target list against your actual endpoint configurations. Run the playbook in a tabletop exercise so your team knows the workflow under calm conditions. Measure your collection time across representative endpoints in your environment, because a 15-minute target means nothing if your network transfer speeds turn it into 45 minutes.
Forensic triage on Windows is not a shortcut. It is a deliberate decision to prioritize speed and relevance over completeness, made with full awareness of the tradeoffs. In eight years of incident response work, I have seen far more investigations stall because teams collected too slowly than because they collected too little. Get the artifacts, build the timeline, and let the evidence tell you what to collect next. If your team needs help building or pressure-testing an IR triage workflow, reach out to our team — this is exactly the kind of engagement we run regularly.
References: SANS Institute maintains updated forensic artifact references and KAPE target documentation. The NIST Cybersecurity Framework provides the incident response lifecycle model that underpins triage-first methodology.